May 7, 2024 PCSD Weekly Notifications
 May 7th, 2024
Every Tuesday we send out an email to every employee with information from the district This email...
All secondary school teachers in Provo City School District have access to publish an official teacher web page.
To access your web page, open a web browser and enter your school’s website address with “/login” at the end.
For example: provohigh.provo.edu The login page for your school looks similar to this:
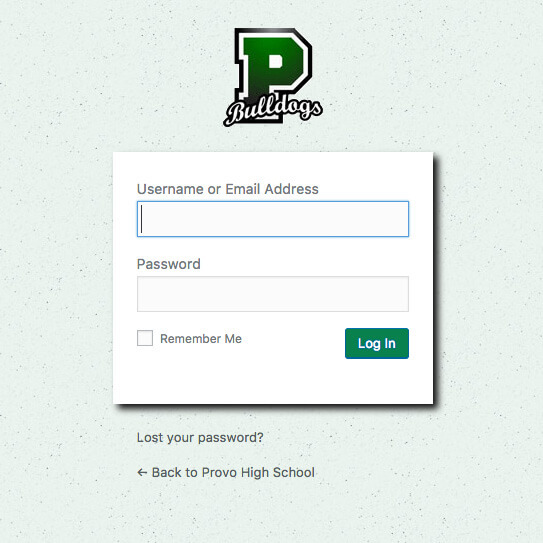
Your login name will be your district email address.
If you don’t know your password, click on the “Lost your Password?” link and follow the instructions to reset it.
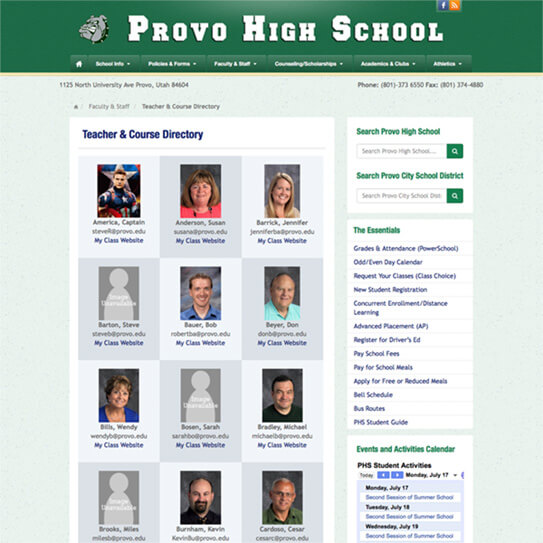
People outside the district access your web page by going to your school’s website and selecting the “Teacher & Course” Directory. The directory will look very similar to this:
There’s a new teacher at Provo High School. His name is Captain America and he has already set up a webpage for himself because… he’s Captain America.
By clicking on “My Class Website” we can see his new web page. It contains useful information. He answers questions that students and parents might have about his teaching style and he offers valuable content they may need.
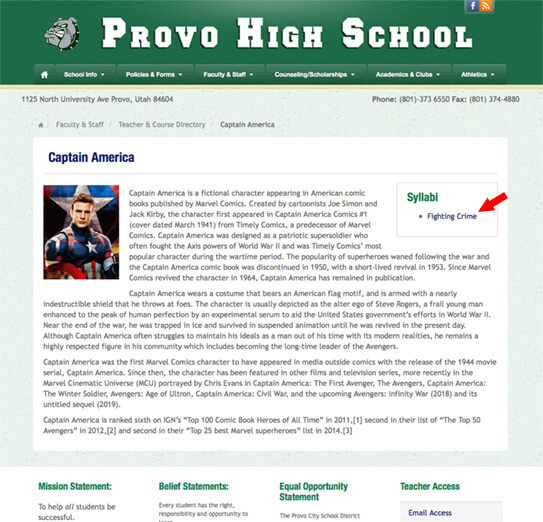
Syllabus information is located in the upper right hand corner of his web page. His class on fighting crime is quite popular among high school students. Let’s walk through how he added his syllabus so quickly and easily.
Step 1: Log into your school’s website

Step 2: When the dashboard appears, click on “Pages” in the left column.
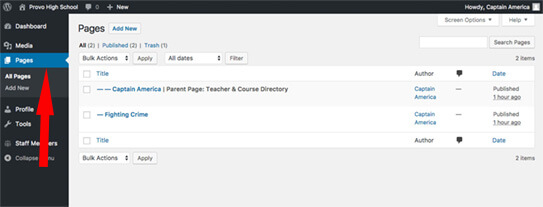
Here you will see a list of web pages that you have access to. At the top of the list is Captain America’s main web page. Any other pages he creates are ‘children’ of that page. He’s already added a syllabus for his Fighting Crime class.
Step 3: To add a new syllabus to your web page, simply click the “Add New” Button at the top of the page.
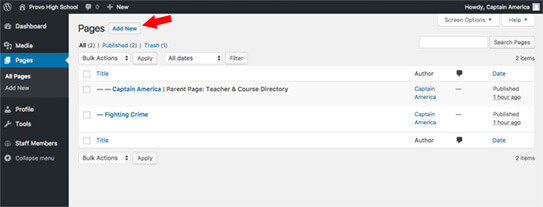
A new web page will appear.
Step 4: Look in the right column and find a box named “Page Attributes”. Be sure to select “Syllabus Page” in the “Template” menu. This will automagically turn your page into a template so you can enter your new syllabus information.

Step 5: The title of your new syllabus is very important. The title you give your syllabus will also be the label of its link. A link to your syllabus will automatically be appear on your main web page, just like Captain America’s web page shown above. The title must make sense to your web page visitors (parents and students) and be a good descriptor of the course.
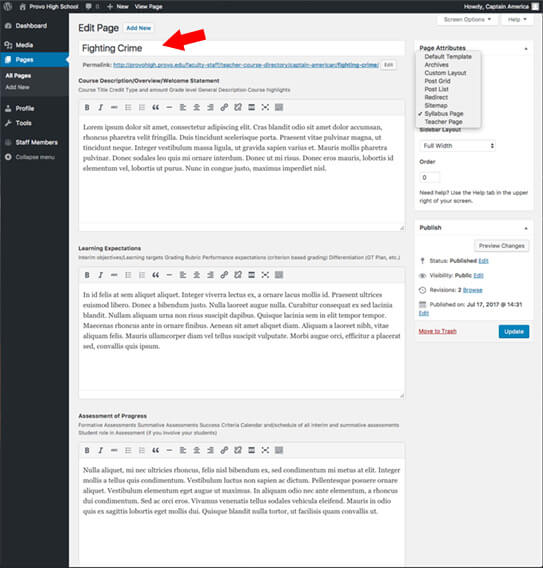
Step 6: Each section of the page is labeled: Course Description, Learning Expectations, Assessment of Progress, etc. Go ahead and fill in each section with the required information.
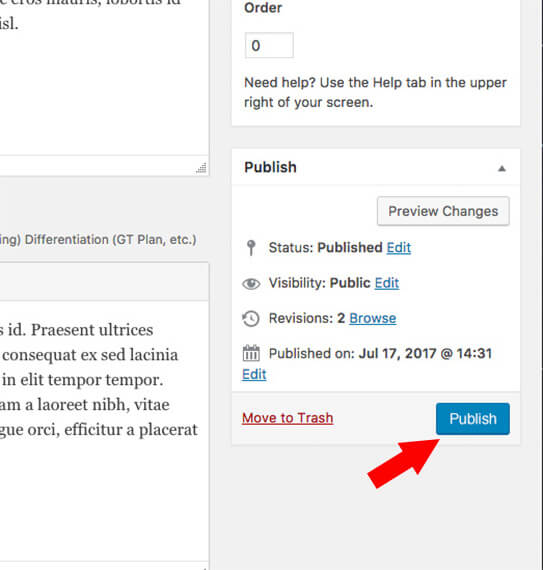
Step 7: When you’re finished entering all the information about your course, click the “Publish” button in the right column to make it live.
You can add as many syllabi to your web page as you wish. You can also go back at any time and change or update your syllabi. Thanks for being a syllabus super hero. You are the captain of your web page. Feel free to make it amazing.
Download Secondary School Teachers: Add a Syllabus to Your Web Page
Every Tuesday we send out an email to every employee with information from the district This email...

Provo Peaks would like to announce the retirement of Richard Keeno, Lisa Fausett, Kathy Hansen,...
Lakeview Elementary would like to announce the retirement of Marilee Wing and Cindy Baer Please...
Centennial Middle School would like to announce the retirement of Linda Threlfall and Julie...
Provo High would like to announce the retirement of Jeri Marshall Please join us at a...

Snorkl is a new app that teachers can use to let all students practice speaking and receive...